# Overview
Streamlit (opens new window) is an open-source Python library which is very popular in the data science and machine learning community. It is useful for quickly creating and sharing beautiful data-driven web apps. There are excellent hosting options for public Streamlit apps, but in enterprise environments, there is a need for sharing such apps in a more controlled way. Entando provides a Kubernetes and cloud-friendly way to do this.
# Create the Bundle
- Start by creating a new bundle for the
Streamlitapp:
ent bundle init streamlit-example
- Change into the bundle root folder:
cd streamlit-example
- Create a location in the bundle for the
Streamlitapp. In an Entando bundle, this means using a microservice to host the app. Use the Entando CLI to add a microservice for the Streamlit app:
ent bundle ms add streamlit-ms --stack custom
- Change into the
streamlit-msdirectory:
cd microservices/streamlist-ms
# Create the Streamlit app
Use the Streamlit install steps (opens new window) to prepare the directory for Streamlit development.
- Add
venvand activate it. This will keep the Python dependencies separated between projects.
The activate path may be different depending on your OS.
python -m venv .venv
source .venv/Scripts/activate
- Use
pipto installstreamlit:
pip install streamlit
- Test
streamlitto make sure it's working. Use CTRL+C to close the hello app.
streamlit hello
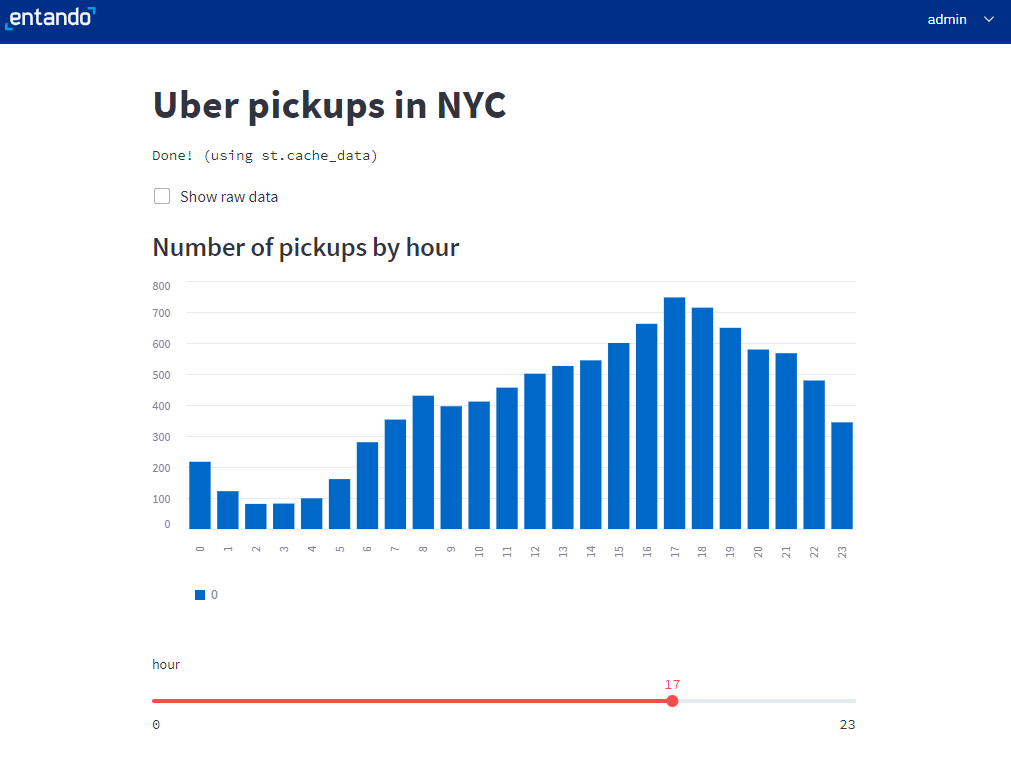
- Follow the
Streamlittutorial to create a simple Uber visualization app (opens new window).
Use a completely different application if you prefer, but the following steps assume the application is found in
streamlit_app.py.
import streamlit as st
import pandas as pd
import numpy as np

st.title('Uber pickups in NYC')

DATE_COLUMN = 'date/time'
DATA_URL = ('https://s3-us-west-2.amazonaws.com/'
            'streamlit-demo-data/uber-raw-data-sep14.csv.gz')

@st.cache_data
def load_data(nrows):
    data = pd.read_csv(DATA_URL, nrows=nrows)
    lowercase = lambda x: str(x).lower()
    data.rename(lowercase, axis='columns', inplace=True)
    data[DATE_COLUMN] = pd.to_datetime(data[DATE_COLUMN])
    return data

data_load_state = st.text('Loading data...')
data = load_data(10000)
data_load_state.text("Done! (using st.cache_data)")

if st.checkbox('Show raw data'):
    st.subheader('Raw data')
    st.write(data)

st.subheader('Number of pickups by hour')
hist_values = np.histogram(data[DATE_COLUMN].dt.hour, bins=24, range=(0,24))[0]
st.bar_chart(hist_values)

# Some number in the range 0-23
hour_to_filter = st.slider('hour', 0, 23, 17)
filtered_data = data[data[DATE_COLUMN].dt.hour == hour_to_filter]

st.subheader('Map of all pickups at %s:00' % hour_to_filter)
st.map(filtered_data)
- Start the application and confirm it's working as expected:
streamlit run streamlit_app.py
# Prepare the Entando Bundle
A few items need to be tweaked to run the Streamlit app in Kubernetes with Entando. Here we're following the Streamlit Kubernetes guide (opens new window) with a few tweaks specific to Entando.
- Use pip to create a
requirements.txtto help when creating the Docker image:
pip freeze > requirements.txt
- Create the
Dockerfilefor the service. This is based on theStreamlitexample and modified to run on port 8081 under the Entando-providedSERVER_SERVLET_CONTEXT_PATH.
FROM python:3.8-slim

RUN pip3 install --no-cache-dir --upgrade \
    pip \
    virtualenv

RUN apt-get update && apt-get install -y \
    build-essential \
    software-properties-common \
    git

WORKDIR /app

COPY . /app

ENV VIRTUAL_ENV=/app/venv
RUN virtualenv ${VIRTUAL_ENV}
RUN . ${VIRTUAL_ENV}/bin/activate && pip install -r /app/requirements.txt

# Entando settings
## Required port for microservices
EXPOSE 8081
## Context path is provided by the engine based on the bundle id
ENV SERVER_SERVLET_CONTEXT_PATH=/default

COPY run.sh /app
ENTRYPOINT ["./run.sh"]
- Setup an entrypoint script
run.sh. This script is to used to start Streamlit and also includes some minor adjustments for Entando.
#!/bin/bash

APP_PID=
stopRunningProcess() {
    # Based on https://linuxconfig.org/how-to-propagate-a-signal-to-child-processes-from-a-bash-script
    if test ! "${APP_PID}" = '' && ps -p ${APP_PID} > /dev/null ; then
       > /proc/1/fd/1 echo "Stopping ${COMMAND_PATH} which is running with process ID ${APP_PID}"

       kill -TERM ${APP_PID}
       > /proc/1/fd/1 echo "Waiting for ${COMMAND_PATH} to process SIGTERM signal"

        wait ${APP_PID}
        > /proc/1/fd/1 echo "All processes have stopped running"
    else
        > /proc/1/fd/1 echo "${COMMAND_PATH} was not started when the signal was sent or it has already been stopped"
    fi
}

trap stopRunningProcess EXIT TERM

source ${VIRTUAL_ENV}/bin/activate

BASEURLPATH=
if [ -z "$SERVER_SERVLET_CONTEXT_PATH" ]
then
   echo "Context path not set"
else
   BASEURLPATH=" --server.baseUrlPath=$SERVER_SERVLET_CONTEXT_PATH"
fi
echo "BASEURLPATH: $BASEURLPATH"

streamlit run /app/streamlit_app.py --server.port=8081 --logger.level=debug --browser.gatherUsageStats=False $BASEURLPATH & APP_ID=${!}

wait ${APP_ID}
- Add a
.dockerignorefile with one line, so the .venv files are not included in the eventual Docker image.
Add a similar line to your top-level
.gitignoreto avoid committing those files
.venv
- Update the health check and custom commands in the
entando.json:
"healthCheckPath": "/_stcore/health",
"commands": {
    "build": "echo 'no build required'",
    "run": "streamlit run streamlit_app.py",
    "pack": "docker build -t streamlit-ms ."
}
- Change back to the bundle root directory and check that the run command works:
ent bundle run streamlit-ms
# Deploy the Bundle to Entando
You should now be able to build, deploy, and install the bundle using the standard steps.
ent bundle packent bundle publishent bundle deployent bundle installWARNING
# Warning Workaround Territory
In Entando 7.2.2 (or earlier), the Streamlit service will start successfully but the health check built into the Component Manager will NOT recognize that it's healthy since Streamlit returns an HTML rather than a JSON response. Streamlit does not provide an option to customize the health check or provide a custom JSON endpoint, so short of using a reverse proxy, two manual steps are required after the bundle is installed. A fix for this is planned in a future release of Entando.
The bundle IDs in the following steps will vary if you cloned the project source.
- When the health check fails, Entando will rollback the install but it will only shutdown the Streamlit pod. Restart the Streamlit pod:
kubectl scale deploy pn-3d37ebd9-2d0e3ade-nathanshaw-streamlit-ms-deployment --replicas=1
- Entando will also remove the ingress path for the
streamlit-msservice. Add this manually into the Entando default ingress.
- backend:
          service:
            name: pn-3d37ebd9-2d0e3ade-nathanshaw-streamlit-ms-service
            port:
              number: 8081
        path: /streamlit-example-3d37ebd9/streamlit-ms
        pathType: Prefix
Verify the service is working by accessing YOUR-HOST/SERVER_SERVLET_CONTEXT_PATH. The default path should show the Streamlit application.
Adding
/_stcore/healthto the URL should showokfrom the Streamlit health check.
# Create a Streamlit widget
Now that the service is working, you can create a simple Entando widget to display the Streamlit app embedded on a page. See the Simple Widget Tutorial for the basic steps and the Streamlit Embed documentation (opens new window) for options to customize the embedded display.
- Go to
Components→Widgetsto create a simple widget. Make sure to update the path to match your service.
<iframe
  src="/streamlit-example-3d37ebd9/streamlit-ms?embed=true"
  height="800"
  style="width:100%;border:none;"
></iframe>
- Create a page and place the widget on that page:
# Reference
- The source code for this example (opens new window) can be found in GitHub.