# Entando Strapi
# Overview
Entando 7 offers a Strapi packaged business capability (PBC) to provide the flexibility and customization of a leading open source and headless CMS. Users are able to create and organize application content through the seamless integration of Strapi into the App Builder experience.
The Strapi PBC is available on the Entando Cloud Hub (opens new window). This tutorial uses notable quotes as a content example to cover:
- Prerequisites
- Installation
- Configuration and Content Creation
- Create and Manage a Content Template
- Next Steps
# Prerequisites
- A working instance of Entando
- Verify dependencies with the Entando CLI:
ent check-env develop - An ent profile linked to the Kubenetes context to be used in this tutorial
# Installation
Entando's Strapi implementation is available from the Entando Cloud Hub via three bundles, which must be installed in the Local Hub of the App Builder.
- Create a file named
strapi-pvc.yamlwith this snippet:
apiVersion: v1
kind: PersistentVolumeClaim
metadata:
  name: pn-fe9131bb-ca5e5232-entando-strapi-server-pvc
spec:
  accessModes:
    - ReadWriteOnce
  resources:
    requests:
      storage: 2Gi
  storageClassName: csi-cinder-high-speed
- Create the persistent volume claim (PVC) using this command:
ent kubectl apply -f strapi-pvc.yaml -n entando
Note: Environments such as OKD require steps 1 and 2 to prevent an issue with memory allocation during microservice startup. However, applying the persistent volume claim does not otherwise impact the installation of the Strapi bundles in other environments.
- Using the ent CLI, deploy the Strapi bundles in the following order:
ent ecr deploy --repo=https://github.com/Entando-Hub/entando-strapi-bundle.git
ent ecr deploy --repo=https://github.com/Entando-Hub/entando-strapi-config-bundle.git
ent ecr deploy --repo=https://github.com/Entando-Hub/entando-strapi-widgets-bundle.git
- Install the bundles into your Local Hub:
ent ecr install entando-strapi-bundle
ent ecr install entando-strapi-config-bundle
ent ecr install entando-strapi-widgets-bundle
# Role Mapping
To add Keycloak role mapping for the entando-strapi-config and entando-strapi-templates clients:
- Log in to your Keycloak instance as an admin. The Keycloak admin page is located at the App Builder base URL plus /auth, e.g.
http://YOUR-SERVER-URL/auth. - From the left menu, select
Users→View all users - Click on the ID associated with the admin username
- Click on the tab
Role Mappings - From the
Client Rolesdrop-down, select the role ending in "strapi-config-server"- Select all
Available Rolesand add them to ClientAssigned Roles
- Select all
- From the
Client Rolesdrop-down, select the role ending in "strapi-template-server"- Select all
Available Rolesand add them to ClientAssigned Roles
- Select all
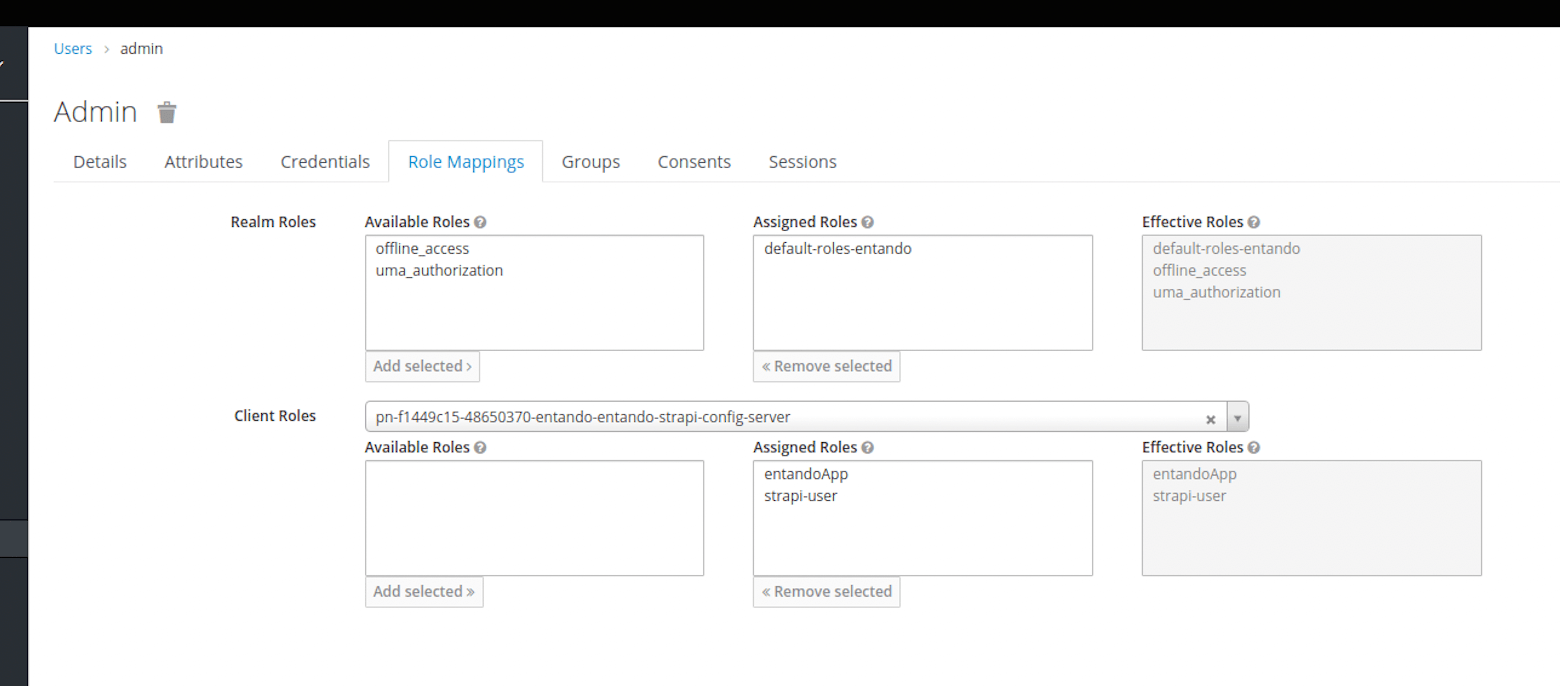
Note: To access the Strapi APIs, the App Builder user is given the Super Admin role using the existing Entando Keycloak token for authentication.
# Registration
You must register after installation and role mapping to use Strapi within the Entando Platform. The PBC creates a new Strapi instance for your Entando Application. It does not provide a mechanism to link an existing Strapi instance.
To log in to your Entando Strapi instance:
Open a browser tab and enter your App Builder base URL followed by
/entando-strapi/admin/, e.g.http://YOUR-SERVER-URL/entando-strapi/admin/Enter the following credentials and log in:
- username: strapi@entando.local
- password: adminadmin

# Configuration and Content Creation
To begin using Strapi on Entando, you must first create content to configure Strapi access from the App Builder. This is done through the Strapi Config Widget. Then content templates are built for each content, providing type and display specifications.
Perform the steps in the following order to properly prepare your Entando Application:
- Create content for use by the Strapi Content Template Widget
- Configure the Strapi Config Widget with the URL of your Strapi instance
- Create a content template using the Strapi Content Template Widget
# Create Content in Strapi
For this tutorial, a content collection consisting of quotes is used as an example.
Log in to Strapi
From the left sidebar, click
Content-Type Builder, andCreatea new collection typeEnter “Quote” and click
Continue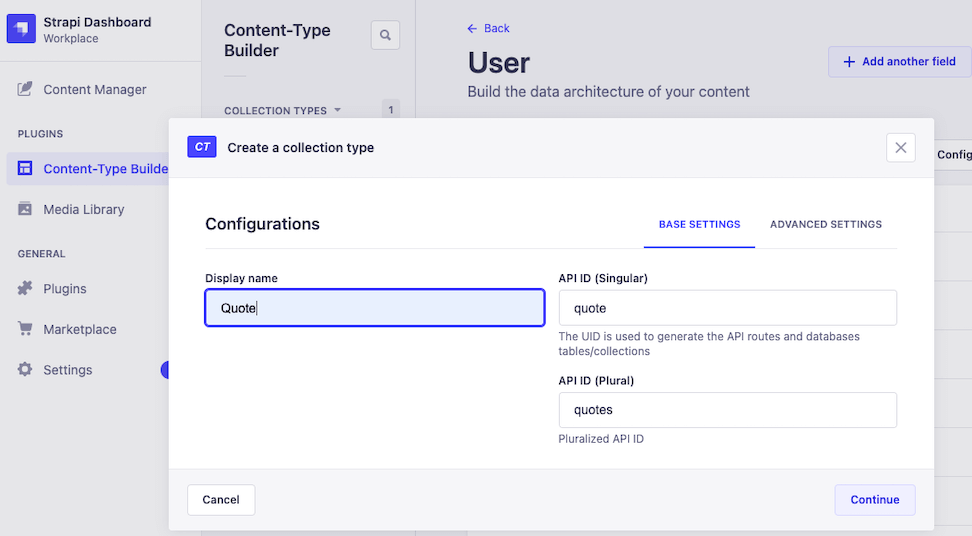
Choose
Textfor the collection typeAdd a new field named "quotes" and select
Short text. ClickFinishandSaveunless you want to add additional fields.Select “Content Manager” from the left sidebar to add entries to the quotes field
Select “Quote” under “Collection Types” and click
Create new entry. Add a quote and clickSave. Here are a few to choose from:
“If life were predictable it would cease to be life, and be without flavor.” Eleanor Roosevelt
“Simplicity, carried to the extreme, becomes elegance.” Jon Franklin, computer scientist
"A good programmer is someone who always looks both ways before crossing a one-way street." Doug Linder, computer scientist
"You are your best thing." Toni Morrison
For a more in-depth look at creating content on Strapi, try the Quick Start Guide (opens new window) for a tutorial or the Strapi user guide (opens new window).
# Configure the Strapi Instance
The Strapi Config Widget provides the Strapi Content Template, Strapi Content and Strapi Content List widgets with the URL of the Strapi instance. The URL is managed from a single field entry, which must be defined prior to using the 3 dependent widgets.
Follow the steps below to publish the Strapi Config Widget to a page and expose the Strapi URL.
- Create a page in your Entando Application dedicated to the Strapi Config Widget
- Go to
App Builder→Pages→Management - Find the Strapi configuration page in the page tree and click on the three dots representing the
Actionsicon - Select
Designfrom the drop-down menu - Click on the
Widgetstab in the right panel and expand theUsersection - Drag and drop the Strapi Config Widget into an empty frame on the page
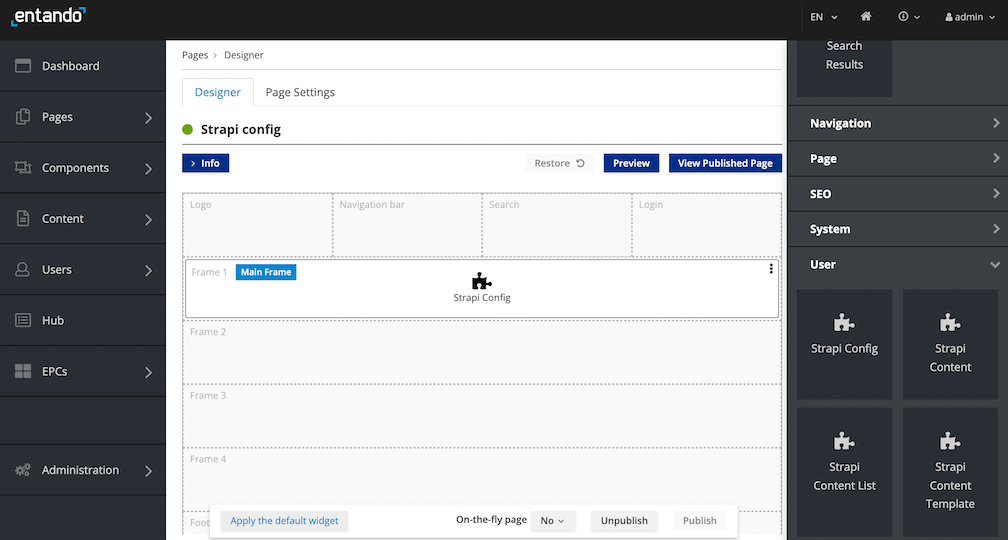
- Click
Publish - Click
View Published Page - On the published page, enter the URL of the Strapi instance, which is your App Builder base URL followed by
/entando-strapi, e.g.http://hubdev.okd-entando.org/entando-strapi

# Create and Manage a Content Template
The instructions below add the Strapi Content Template Widget to a page to create, edit and delete Content Templates directly from the App Builder.
# Create a Content Template
- Create a page in your Entando Application dedicated to the Strapi Content Template Widget
- Go to
App Builder→Pages→Management - Find the Strapi template page in the page tree and click on the
Actionsicon - Select
Designfrom the drop-down - Click on the
Widgetstab in the right panel and expand theUsersection - Drag and drop the Strapi Content Template Widget into an empty frame in the middle panel
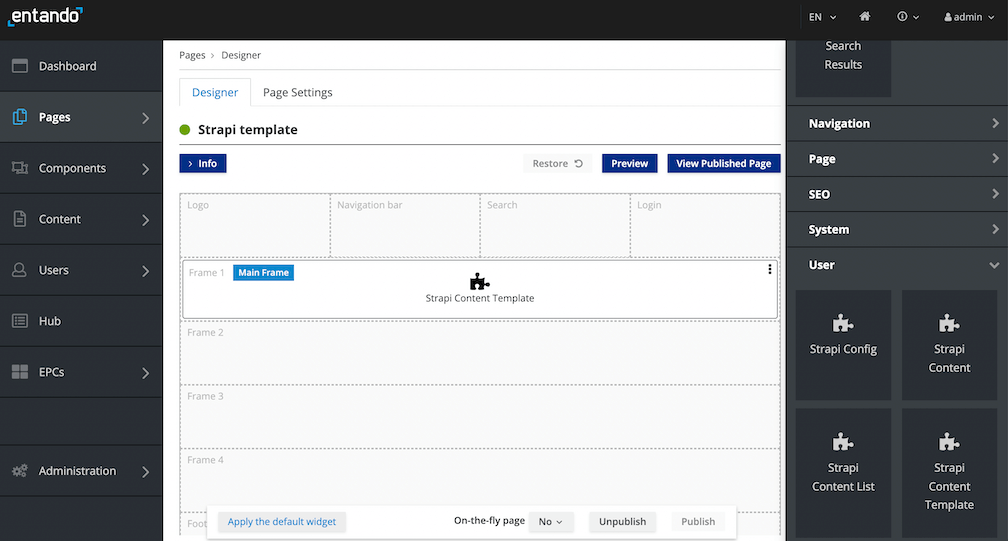
- Click
Publish - Click
View Published Page - Click
Addon the right - Add a content template by choosing "Quote" from the collection you created, entering a
Namesuch as "Quote Corner", and creating theHTML Modelas shown below. TheAttributesare automatically populated from the collection type you chose and created.
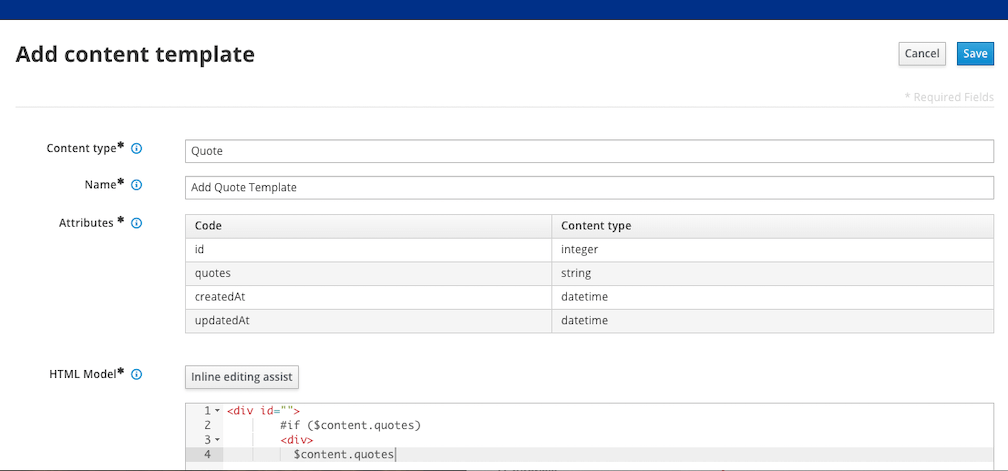
Content type: The drop-down displays existing content types
Name: Name of the template associated with the selected content type
Attributes: Pre-populated from the Strapi definition of the content type
HTML Model: HTML for the template. You can use your own with the help of
Inline editing assistor add the following snippet to display the content for "Quote".<div id=""> #if ($content.quotes) <div> $content.quotes </div> #else <div> no quotes </div> #end </div>
- Click
Saveto add to the Template list.
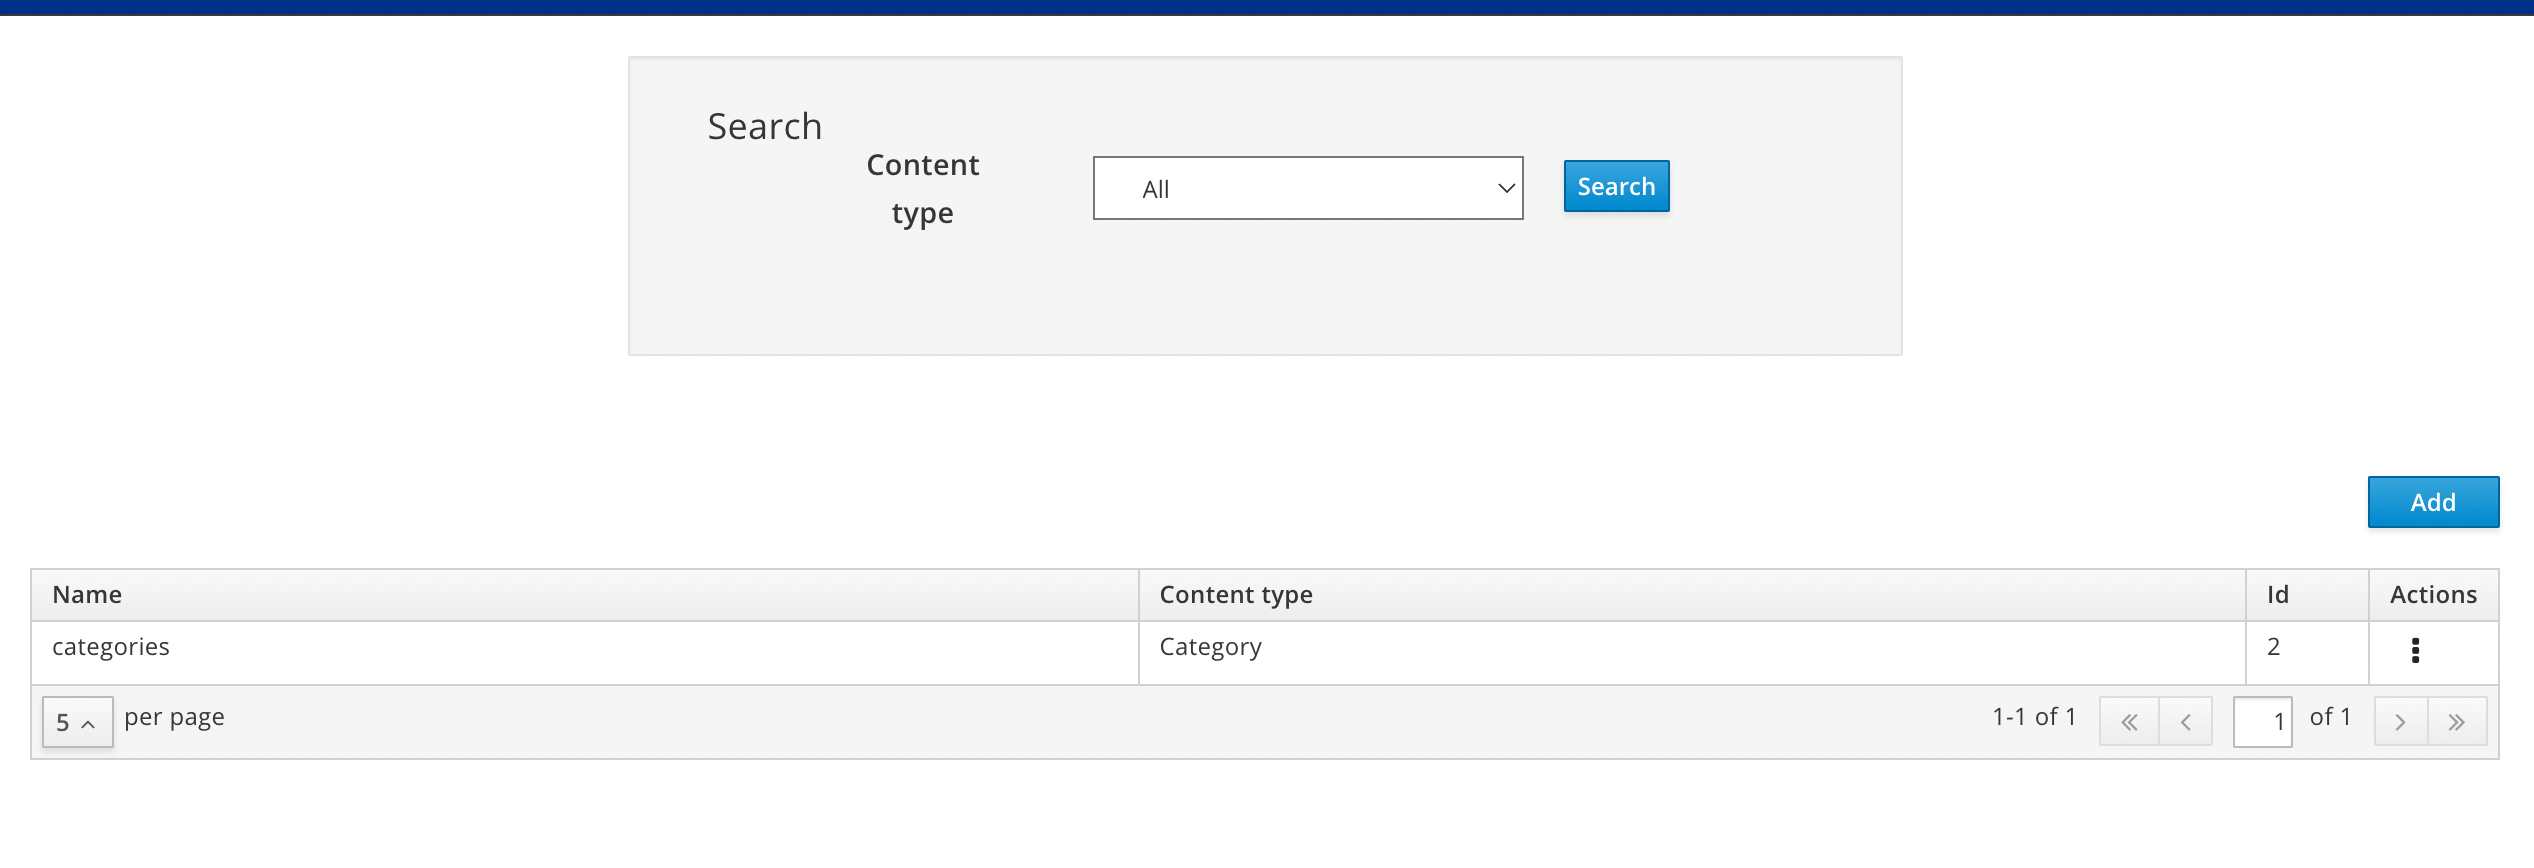
# Edit a Content Template
- Go to
App Builder→Pages→Management - Find the Strapi template page in the page tree and click on the
Actionsicon - Select
View Published Pagefrom the drop-down - Click the three dots drop-down menu on the right under
Actionsfor the template and selectEdit
- Make changes to the name or HTML Model and/or Style Sheet fields and click
Savewhen done
Notes:
- You may not modify the content type
- Editing the template will not change the ID of the content template
# Delete a Content Template
- Go to
App Builder→Pages→Management - Find the Strapi template page in the page tree and click on the
Actionsicon - Select
View Published Pagefrom the drop-down menu - Click on the three dots on the right of the line listing the template
- Select
Delete - Click
Deletein the pop-up box to confirm
# Next Steps
You are now able to develop your Entando Application using Strapi! To learn how to apply and manage content, check out the following tutorials:
- Display and List Strapi Content
- TODO: Strapi Content Tutorial