# Create an Angular Micro Frontend
Prerequisites
Tested Versions
node v13.8.0 → We suggest using nvm (opens new window) to handle node installations.
# Create Angular App
Install Angular CLI.
npm install -g @angular/cli
Generate a new angular application.
ng new angular-widget
Choose the following options:
? Would you like to add Angular routing? No
? Which stylesheet format would you like to use? CSS
Serve the application.
cd angular-widget
ng serve
This is the expected output:
angular-widget
├── e2e
│   └── src
│       ├── app.e2e-spec.ts
│       └── app.po.ts
│
├── node_modules
├── src
│   ├── app
│   │   ├── app.component.css
│   │   ├── app.component.html
│   │   ├── app.component.spec.ts
│   │   ├── app.component.ts
│   │   └── app.module.ts
│   │
│   ├── assets
│   │   └── .gitkeep
│   │
│   ├── environment
│   │   ├── environment.prod.ts
│   │   └── environment.ts
│   │
│   ├── favicon.ico
│   ├── index.html
│   ├── main.ts
│   ├── polyfills.ts
│   ├── styles.css
│   └── test.ts
│
├── .editorconfig
├── .gitignore
├── angular.json
├── browserlist
├── karma.conf.js
├── package.json
├── README.md
├── tsconfig.app.json
├── tsconfig.json
├── tsconfig.spec.json
└── tslint.json
# Convert to Custom Element
Next, let's convert our Angular app into a custom element. We'll use Angular elements (opens new window) to transform components into custom elements.
ng add @angular/elements
WARNING
Install the Angular elements package using ng add, not with npm install as it runs additional steps behind the scenes like adding the document-register-element polyfill.
Open angular-widget/src/app/app.module.ts.
- Here's what the initial file looks like:
import { BrowserModule } from '@angular/platform-browser';
import { NgModule } from '@angular/core';

import { AppComponent } from './app.component';

@NgModule({
  declarations: [
    AppComponent
  ],
  imports: [
    BrowserModule
  ],
  providers: [],
  bootstrap: [AppComponent]
})
export class AppModule { }
Replace the entire file with:
import { BrowserModule } from '@angular/platform-browser';
import { NgModule, Injector } from '@angular/core';
import { createCustomElement } from '@angular/elements';
import { AppComponent } from './app.component';

@NgModule({
  declarations: [
    AppComponent
  ],
  imports: [
    BrowserModule
  ],
  providers: [],
  entryComponents: [AppComponent]
})
export class AppModule {
  constructor(private injector: Injector) {}

  ngDoBootstrap() {
    const el = createCustomElement(AppComponent, { injector: this.injector });
    customElements.define('angular-widget', el);
  }
}
- In the initial file,
AppModuleis bootstrapped directly during application launch. - In the updated file, we booststrap our custom element using the
ngDoBootstrap()method (opens new window).
Custom Elements
- Must contain a hyphen
-in the name. (opens new window): - Cannot be a single word.
- Should follow
kebab-casefor naming convention.
# Test Micro Frontend
Now, let's check our custom element to see if it's working.
Open angular-widget/src/index.html.
In the <body>, replace <app-root></app-root> with your custom element <angular-widget />.
<!doctype html>
<html lang="en">
<head>
  <meta charset="utf-8">
  <title>AngularWidget</title>
  <base href="/">
  <meta name="viewport" content="width=device-width, initial-scale=1">
  <link rel="icon" type="image/x-icon" href="favicon.ico">
</head>
<body>
  <angular-widget />
</body>
</html>
Congratulations!
You’re now running Angular in a micro frontend.
# Build It
From the project root, type:
ng build --prod --outputHashing=none
This will generate an angular-widget/dist directory.
If we assume browser support for ES6 (ECMAScript 2015) (opens new window), we can focus on the following JavaScript files to publish our app:
main-es2015.jspolyfills-es2015.jsruntime-es2015.js
Generated Build Files
--outputHashing=none generates files without hashes so we can deploy new versions of the micro frontend without having to reconfigure our widget in Entando to point to the newly built files.
If you want to use file names with content hashes to avoid potential caching issues in your browser, you can update the Custom UI field of your widget after building new versions of your micro frontend. Widget configuration is covered in the next section.
# Host Micro Frontend
Now we're ready to host our micro frontend in Entando.
# Create Public Folder
Navigate to
Entando App Builderin your browser.Click
Administrationat the lower left hand side of the screen.Click the
File Browsertab.Click the
publicfolder.Click
Create Folder.Enter
angular-widgetClick
Save.Click
angular-widget.Click 'Upload Files`.
Upload the following files from
angular-widget/dist/angular-widget:
main-es2015.jspolyfills-es2015.jsruntime-es2015.js
Additional Deployment Options
- Install the micro frontend from a bundle in the
Entando Component Repository. - Add the micro frontend to
Entando App Builder. - Load the micro frontend from an API.
# Add Widget
- Go to
Components > Micro frontends & Widgetsin the Entando App Builder. - Click
Addat the lower right.
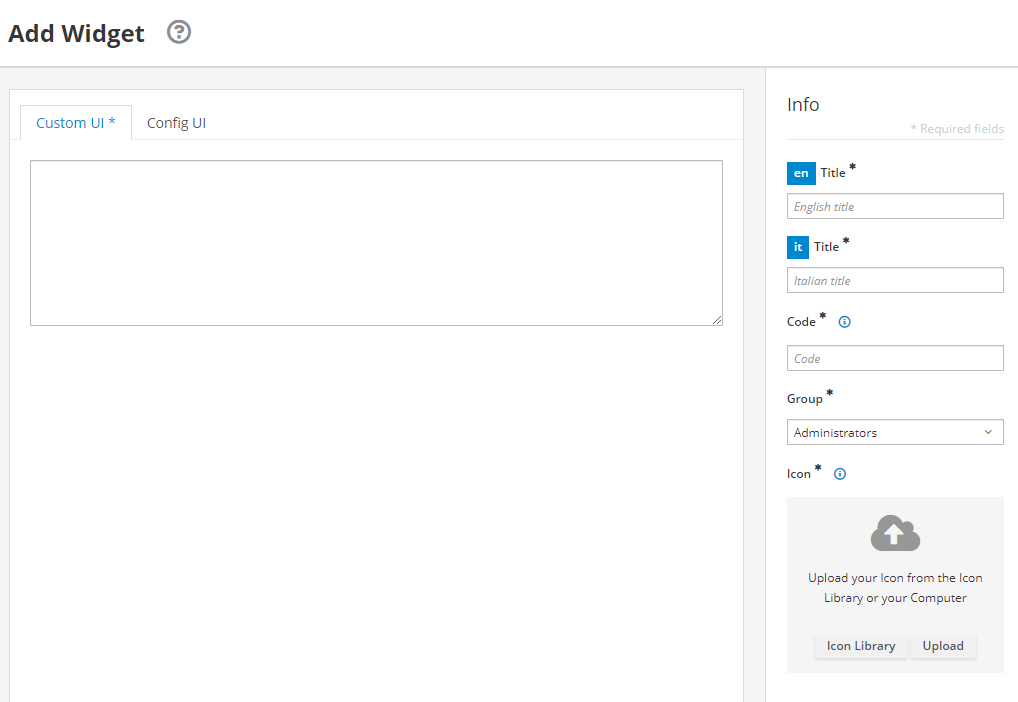
- Enter the following:
Code: angular_widget→ note: dashes are not allowedTitle: Angular Widget→ for both English and Italian languagesGroup: Free AccessCustom UI:
<#assign wp=JspTaglibs[ "/aps-core"]>
<script async src="<@wp.resourceURL />angular-widget/main-es2015.js"></script>
<script async src="<@wp.resourceURL />angular-widget/polyfills-es2015.js"></script>
<script async src="<@wp.resourceURL />angular-widget/runtime-es2015.js"></script>

<angular-widget />
- Click
Save.
TIP
<#assign wp=JspTaglibs[ "/aps-core"]> gives you access to the @wp object where you can use environment variables like resourceURL.
# See It in Action
Let's see the Angular micro frontend in action on our page.
# Add Page
Note
If you've already configured your home page:
- Next to the Home folder, under Actions, click Configure.
- Skip to the Add Widget section.
Let's add our widget to the Home page.
Go to
Pages→ManagementNext to the
Homefolder, underActions, clickEdit.Next to
Page TemplateselectService Page.Click
Save and Configure.
# Add Widget
In the Search field in right-hand sidebar, enter
Angular Widget.Drag and drop
Angular Widgetinto theSample Framein the main body of the page.Click
Publish.At the upper right, click
Go to Homepage.
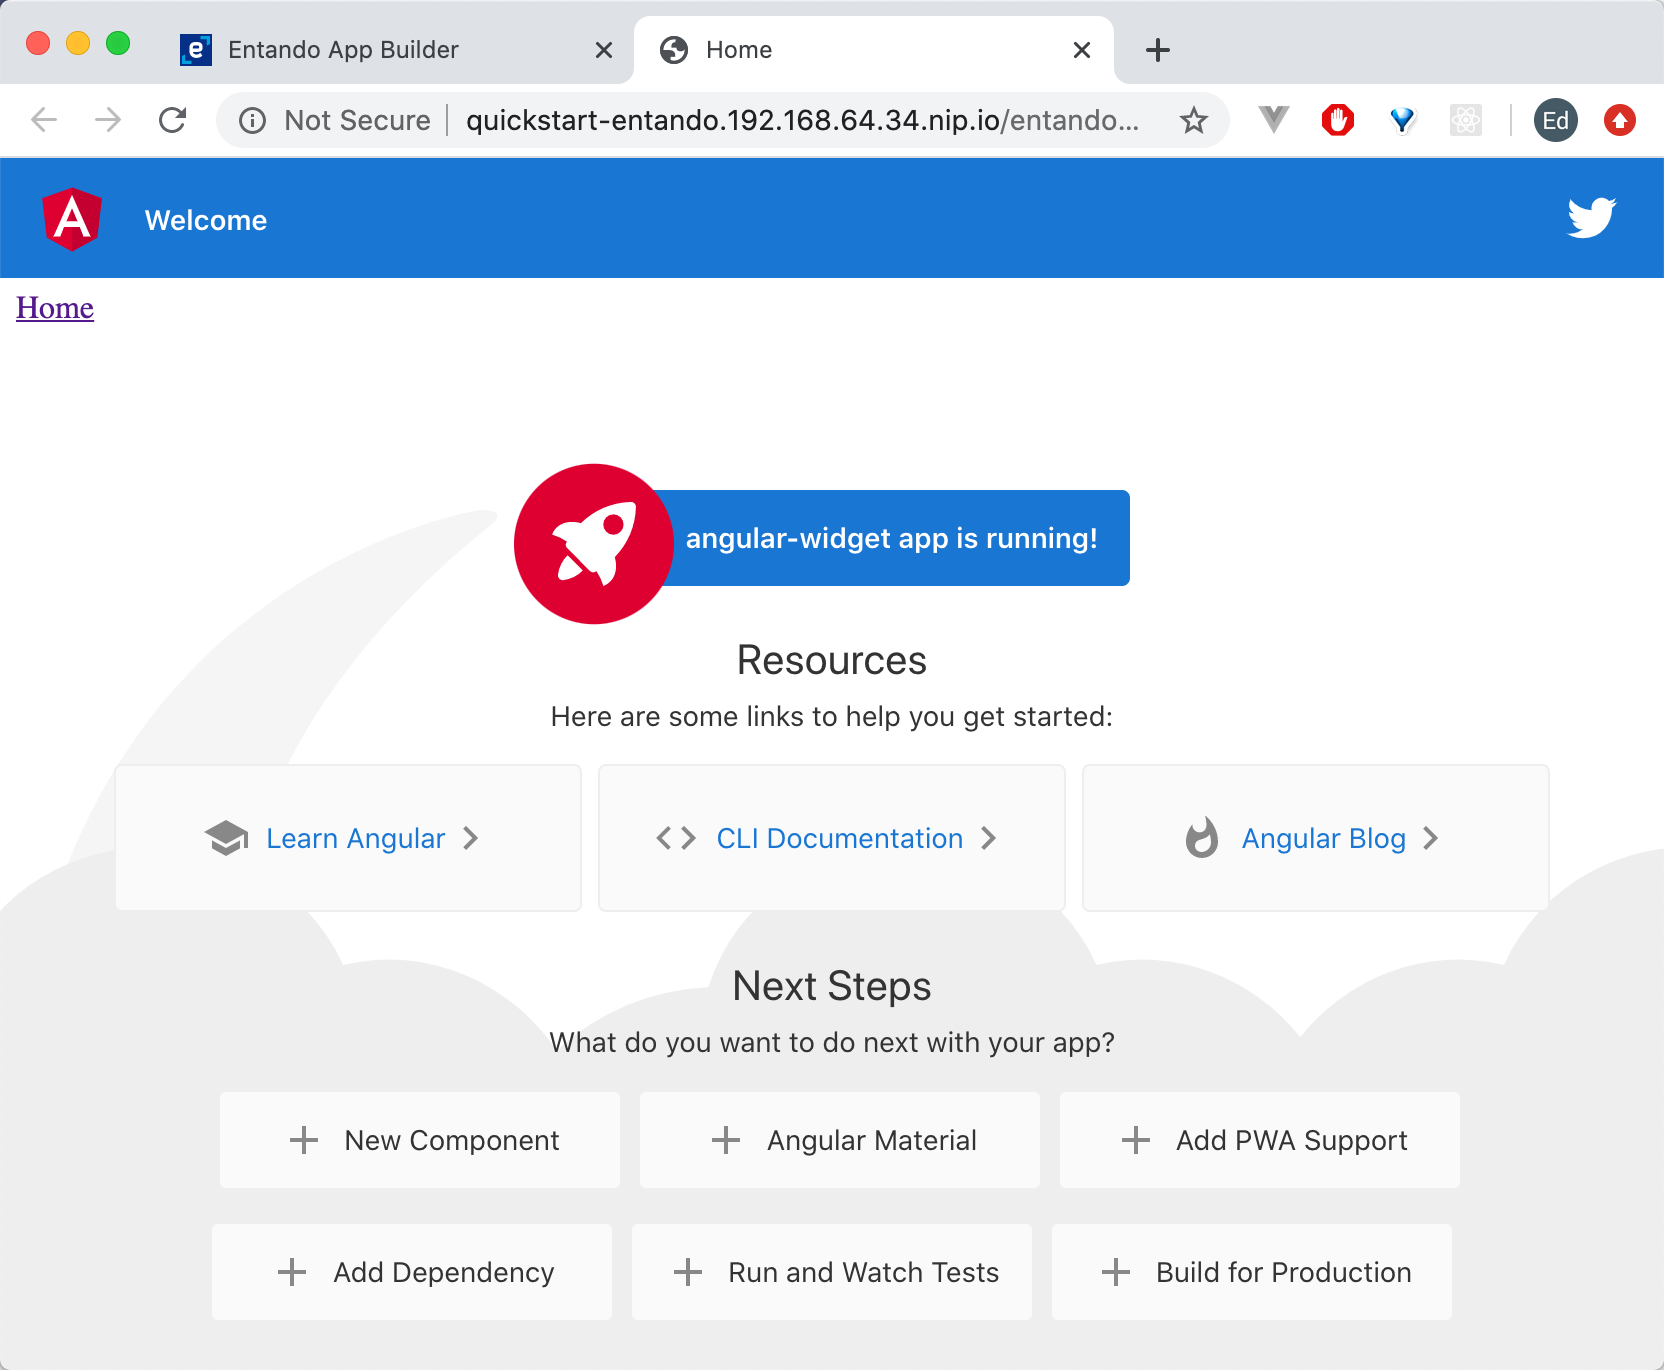
Congratulations!
You now have an Angular micro frontend running in Entando.
← React Communication →