# Entando Customer Portal
# Overview
The Entando Customer Portal enables an organization to quickly provide a modern, self-service customer-facing application for managing subscriptions. It includes a lightweight integration to Jira Service Management for access to service tickets and a role based access control (RBAC) design for granting users varying levels of access.
Key Features:
- Customizable service ticket and tracking system with Jira Service Management
- Role based access control with Entando Identity Management System
- Integrated user, customer, project, and subscription management
This tutorial covers:
# Installation
# Prerequisites
- A working instance of Entando running on Kubernetes. See Getting Started for more information or install Entando on any Kubernetes provider.
- Use the Entando CLI command
ent check-env developto verify all dependencies. - A Jira Service Management account.
# Installation
- To install the Customer Portal, run the following commands. Edit the
-n entandooption for each command to match your namespace or project.
ent bundler from-git -r https://github.com/entando-samples/customerportal-application-bundle.git -d | ent kubectl apply -n entando -f -
ent bundler from-git -r https://github.com/entando-samples/customerportal-content-bundle.git -d | ent kubectl apply -n entando -f -
Log into the App Builder.
Go to
Repositoryfrom the left navigation bar. Two Customer Portal bundles will be visible there.Installthe latest version of thecustomerportal-application-bundlefirst, then the latest version of thecustomerportal-content-bundle.To navigate to your Portal:
- From the sidebar →
Page→Management - Find the
Customer Portalpage - From the
Actionspull-down menu →View Published Page
- From the sidebar →
# Configuration
# Administrators
In order to configure the Customer Portal and its users, the administrator will need Jira Service Management and Entando Identity Management System credentials. In this step, the admin connects the CP to Jira and customizes its features.
Note:
- The built-in mapper for email must be enabled on the server client so that user accounts can be retrieved from Jira and new tickets can use that account information.
# Jira Service Management
The administrator utilizes Jira Service Management to create users and projects, define the organization, and configure the service ticket system.
Users who need access to the Customer Portal, beyond subscription and project information, must have a Jira Service Management account.
- Go to Customers to add organizations and projects. Once added, click on the name of the organization to get the ID, needed later, from the URL.
e.g. example.com/jira/servicedesk/projects/ECS/organization/3 → the Organization ID is “3”
# Entando Identity Management System
Logging into the Entando Identity Management System, you will see the landing page shown here. Like the App Builder, the left navigation bar is your guide for managing users, groups, and most importantly, roles. Using the RBAC model, define what access users have by the roles and groups they are assigned. Some important guidelines are noted below.
Set up permissions to configure the service.
- Login to your Keycloak instance as an admin.
- Give at least one user the ability to manage the Customer Portal by granting the
cp-adminrole. Assign thecp-adminrole for theentandodemo-customerportal-serverclient. See Role Assignment in ID Management for more details. - Give the generated plugin client permission to manage users.
- From the left sidebar, go to
Clientsand select client IDentandodemo-customerportal-server. - Click the
Service Accounttab at the top of the page and selectrealm-managementfrom theClient Rolesfield. - Choose
realm-adminfromAvailable Roles. ClickAdd selected. It should appear as anAssigned Role.
- From the left sidebar, go to
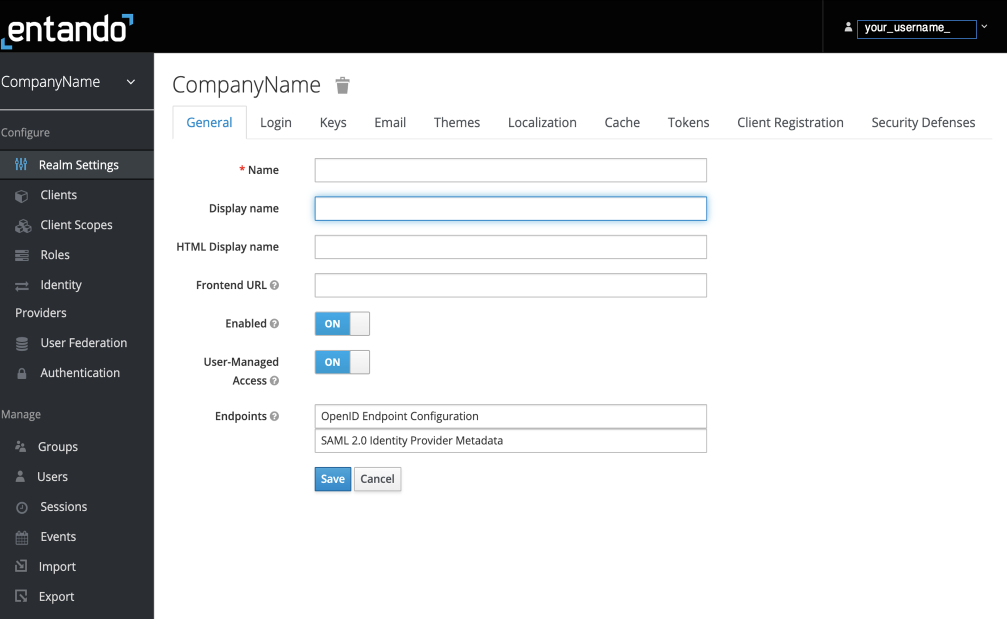
Define the Realm Setting.
TheRealmis a set of users, credentials, roles, and groups. A user belongs to and logs into aRealm.Create Roles
- You can use the default roles by clicking on
Client Rolesand choosingentandodemo-customerportal-server. Access for each role is defined as follows:cp-customer- assigned directly to specific projects for a single customercp-partner- assigned directly to specific projects for multiple customerscp-support- read only view of all customer projectscp-admin- admin access for the Customer Portal
- You can use the default roles by clicking on
Create New Users:
From the sidebar, go to
Users. ClickAdd Userat right.Complete the form as needed but note the requirements for these fields:
Username: a unique name
Email: must use the same address used in Jira
User Enabled→ On
SaveSend an email to the user to activate their account and set a new password:
Go to theCredentialsheader
UnderCredential Reset, in theReset Actions→Update Password
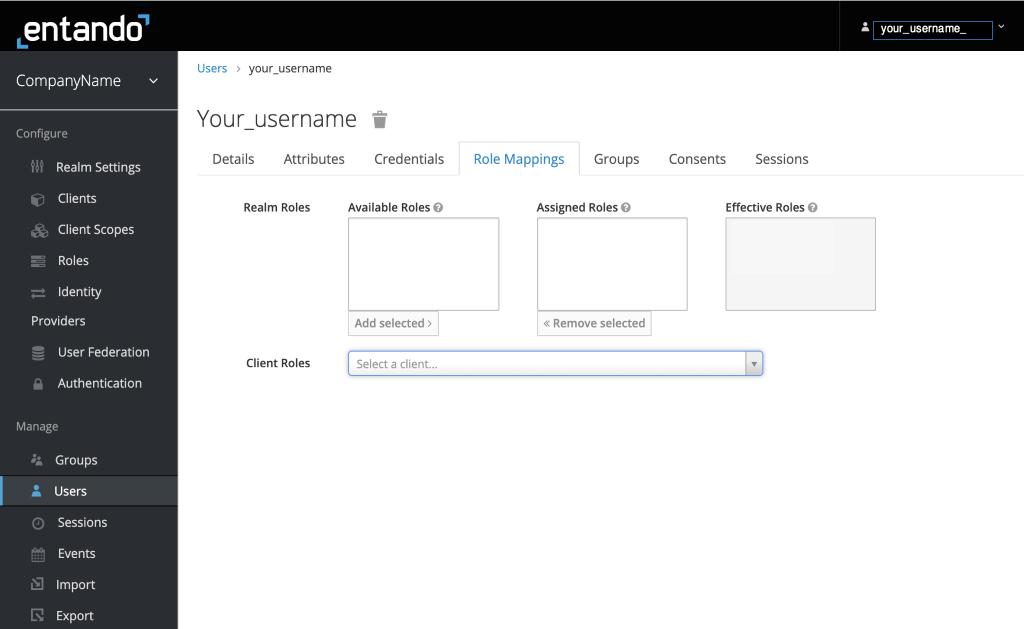
ClickSend EmailGo to Role Mapping:
- Select the appropriate roles from
Available Rolesand clickAdd Selectedto assign. - Choose
entandodemo-customerportal-serverfrom theClient Rolespull-down options to assign default roles. - A full administrative user will need the
realm-adminrole underClient Roles→realm-managementin order to manage users in the Portal. - Check the
Effective Rolescolumn on the right to ensure the correct roles have been assigned.
- Select the appropriate roles from
- Under
Groups, assign roles to groups as needed. Roles are additive.
# Configure the Customer Portal
The Customer Portal must be configured to accommodate a specific Jira Service Management instance. The CP Admin Config page is where you will establish the Jira connection, manage product versions, define subscription levels, and customize ticket types.
To access the CP Admin Config page, you must be given the cp-admin role in the Entando Identity Management System as outlined below.
Go to the CP Admin Config page:
- In the App Builder, go to
Pagesand selectManagement. - Open the Customer Portal folder and find
CP Admin Config. - From the
Actiondrop-down menu on the right, go toView Published Page.
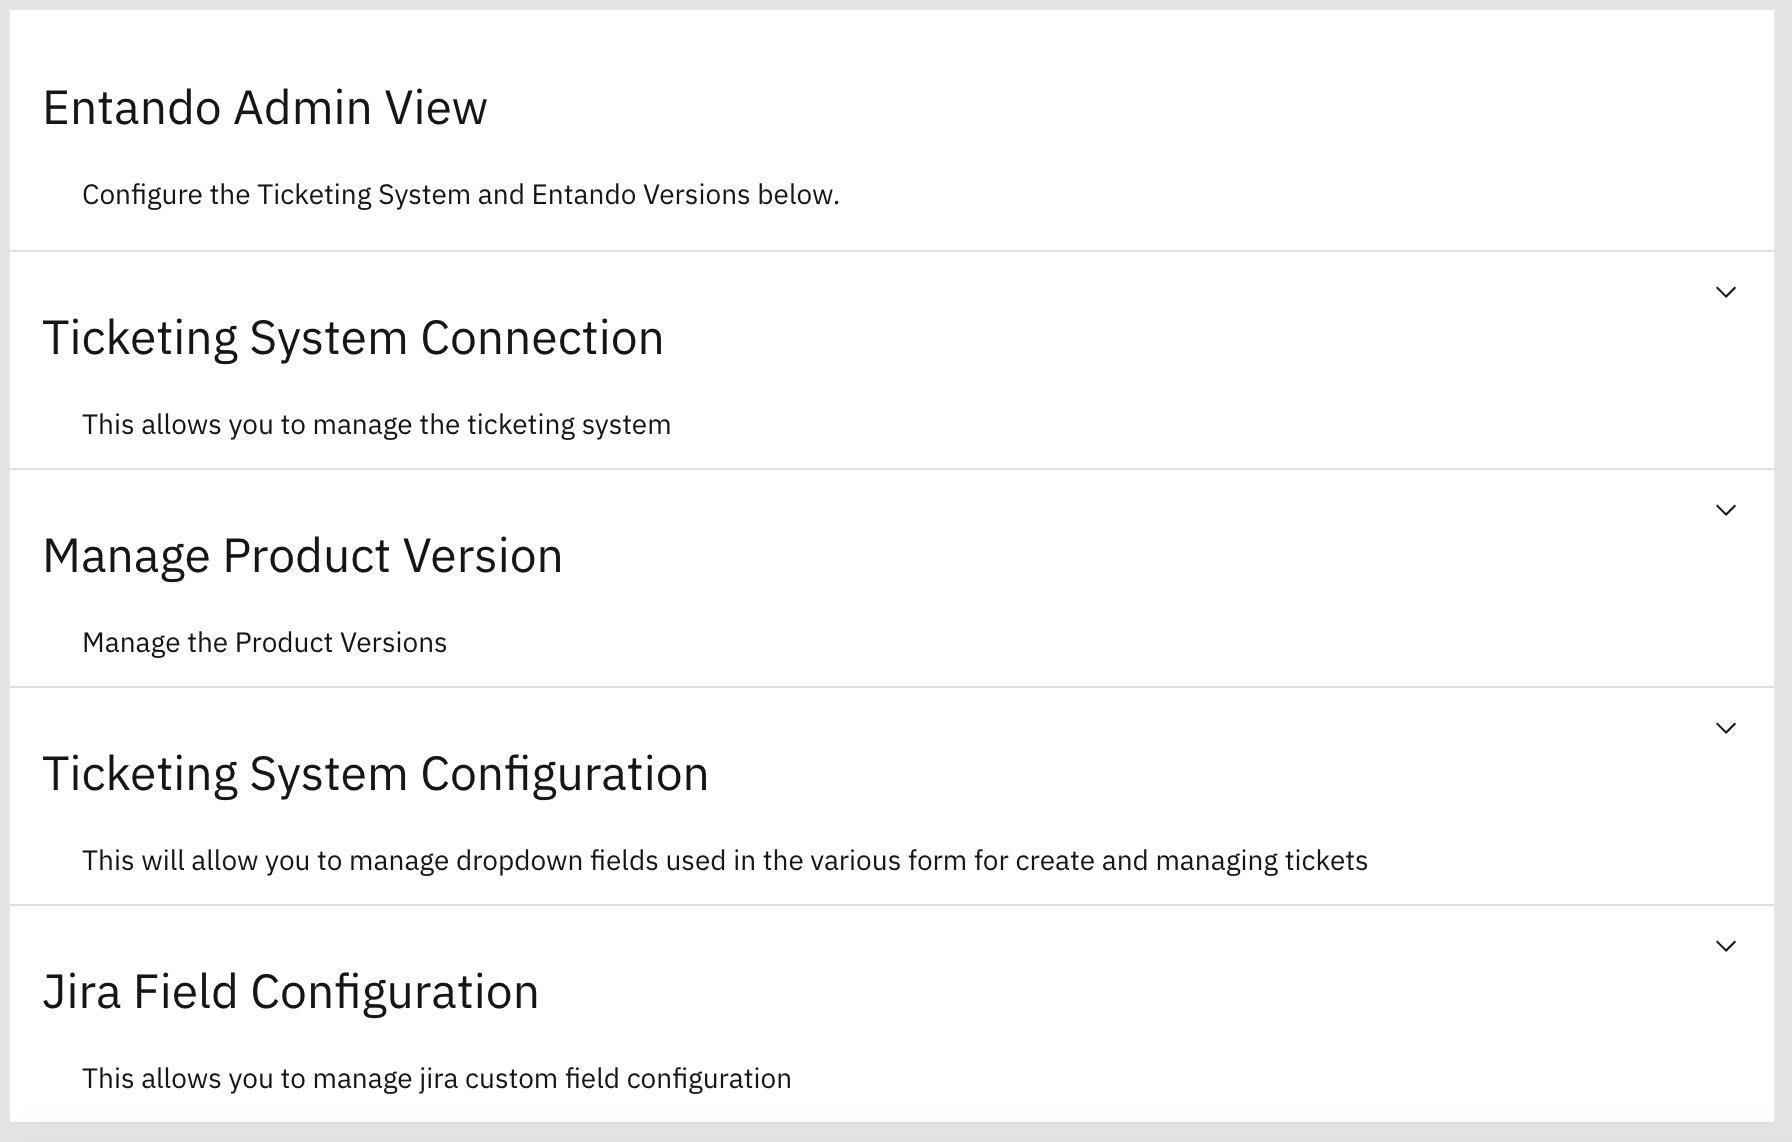 Once the Ticketing System Connection is set up with Jira and the correct URL, default parameters such as product versions and ticket types will be displayed. Open each section with the down arrow to add and edit the fields as needed.
# Managing the Customer Portal
As administrator for the Customer Portal, you can create and manage users, customers, projects, and subscriptions. You can assign projects to users who have activated their account on Jira and have been assigned roles in the Entando Identity Management System.
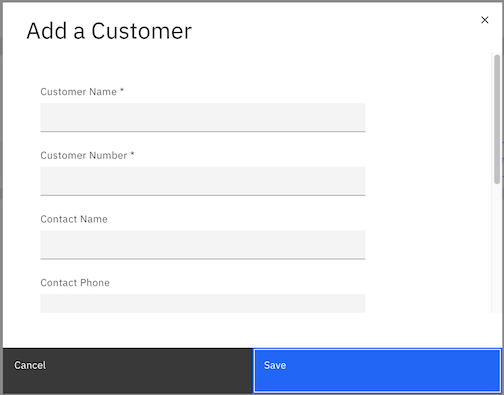
- Create a Customer or Partner
Creating aCustomerandPartneris a similar process. Below are the steps for adding aCustomer. Follow the same procedure for adding aPartner.
- Click
Add a Customer - Fill in the details. Note the following:
- The
Customer Numbermust be unique - The
Notesfield is visible only tosupportandadminusers
- The
- Create and Assign Projects
- From the CP landing page, click on any customer to see the associated project list.
- To create a new project:
- Click
Add a Project. - Enter the
Projectinformation. - Provide the Organization ID from Jira. Each project must have a unique Organization ID.
- Click
Save.
- Click
- To assign
Projects:- From the
Actiondrop-down menu →Manage Users. - Select the user for the
Project. - Click
Submit.
- From the
- Manage Partners and Subscriptions
Use theActiondrop-down menu to manage Partners, and request and manage subscriptions.
# Using the Customer Portal
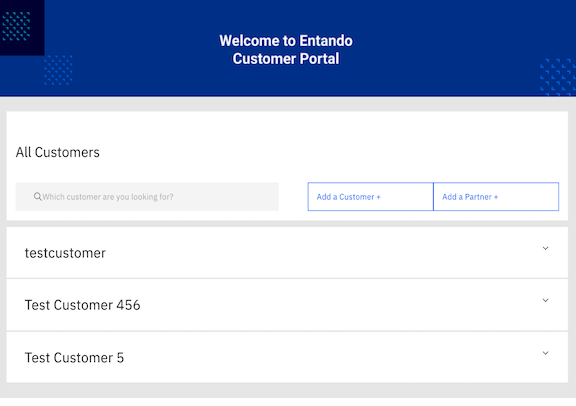
To access the Customer Portal, your organization administrator needs to provide you with the proper user credentials. You can then create and track service tickets as well as request subscriptions.
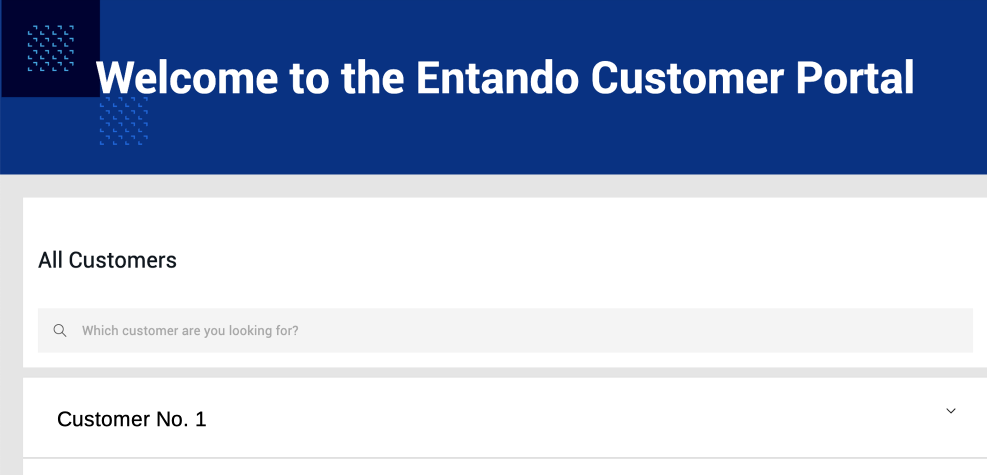
Once you login to the Customer Portal, you will see a list of customers. Click on a customer to view details and track their projects.
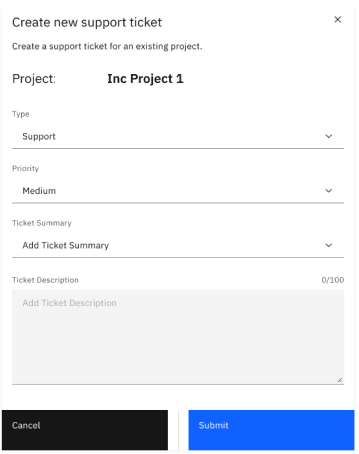
- To create a
Service Ticketfor a project:
from theActionpull-down menu →Open Ticket.
- To request a Subscription or track Tickets:
use theActionpull-down menu and select the corresponding option.
# Resources
Go to Jira Service Management (opens new window) for more information.
The source code for the Entando Customer Portal can be found with our other open source examples and tutorials on GitHub at: https://github.com/entando-samples/customer-portal/ (opens new window)