# Entando Hub
# Overview
The Entando Hub enables teams to share components across their organization and between Entando Applications. It can be installed in Entando 6.3.2 or higher and includes API-level integration with the Entando 7.0 App Builder.
The Hub allows users to:
- Centralize components and business capabilities for use across teams, groups, or clients.
- Publish, manage and communicate component features, versions and metadata.
- Perform business-level assessment of component readiness.
An Entando Application can make use of an Entando Hub in several ways:
The Local Hub, included in the Entando App Builder, displays a collection of components ready to use. They can be used to compose an application or as a starting point to create new components.
Entando Cloud Hub is the public catalog containing packaged business capabilities and components provided by Entando and its partners throughout the world.
An enterprise Entando Hub, developed and curated by Entando clients and partners, can be used to share components within their respective organizations or made available for public use.
This tutorial covers:
# Installation
The Hub is installed using the Local Hub and two Entando Bundles. The first bundle contains the micro frontends and microservices while the second sets up the initial content and pages for the Hub UI.
# Prerequisites
- An Entando Application on any Kubernetes provider. Follow the tutorials appropriate to your environment to install the Entando platform.
- The ent command line tool, installed and connected to your Kubernetes instance.
# Automatically Access the Hub from the App Builder
- Login to your App Builder
- Go to
Hub→Select Registry - Choose
New Registry - In the pop-up window, enter
Entando Hubandhttps://entando.com/entando-hub-api/appbuilder/apifor the URL, thenSave - Click on the Hub in the Registry and continue with the tutorial at Step 4 below
# Manual Installation Steps
- Apply the Custom Resource Definitions for the Hub component bundles.
ent ecr deploy --repo="https://github.com/entando-samples/entando-hub-application-bundle.git"
ent ecr deploy --repo="https://github.com/entando-samples/entando-hub-content-bundle.git"
Log into your App Builder instance.
Select
Hubfrom the menu on the left. Your bundles will be visible in the repository as shown in the screenshot below.
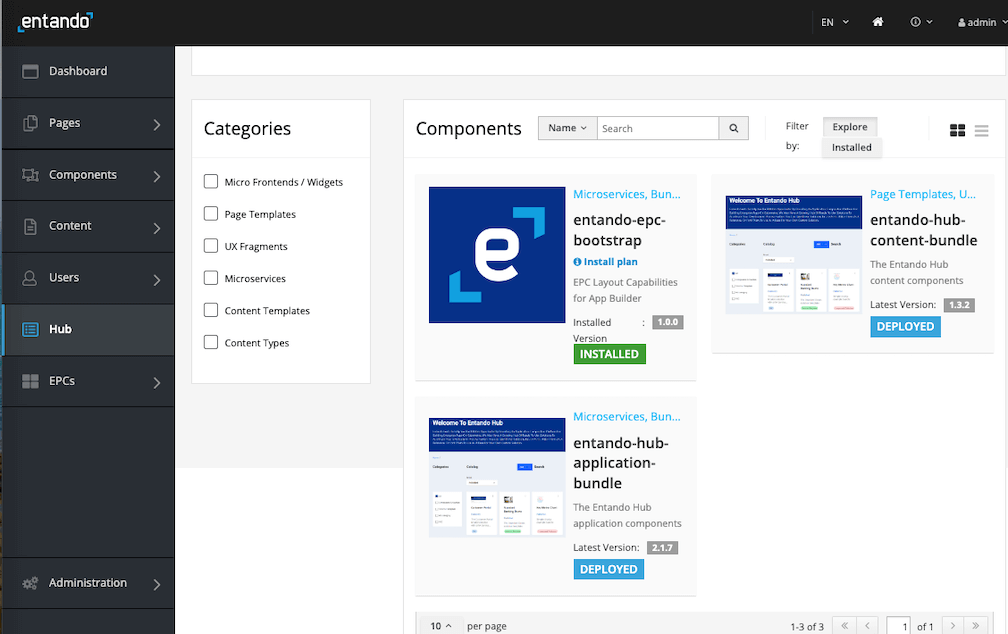
Select
DeployedandInstallfor each bundle, where order of installation is important. Theentando-hub-application-bundlemust be installed first because it provides theentando-hub-content-bundlewith MFEs. It may take several minutes to download the Docker images for the microservices and install related assets.Set up permissions to configure the service:
- Login to your Keycloak instance as an admin.
- Give at least one user the ability to manage the Hub by granting the
eh-adminrole. Assign theeh-adminrole for thepn-cee95efc-77ff566e-entandopsdh-entando-hub-catalog-ms-serverclient. See Role Assignment in ID Management for more details. - Give the generated plugin client permission to manage users.
- From the left sidebar, go to
Clientsand select client IDpn-cee95efc-77ff566e-entandopsdh-entando-hub-catalog-ms-server. - Click the
Service Accounttab at the top of the page and selectrealm-managementfrom theClient Rolesfield. - Choose
realm-adminfromAvailable Roles. ClickAdd selected. It should appear as anAssigned Role.
- From the left sidebar, go to
Access the Hub from the App Builder by navigating to
Pages → Management, findingEntando Hubin the page tree, and clickingView Published Pagefrom its actions.
# Configuration
TIP
(Entando 7.0+) Any Hub instance can be accessed from the Entando App Builder of another Entando Application. Configure the App Builder to access the desired Hub instance via the endpoint BASEURL/entando-hub-api/appbuilder/api, where the BASEURL is the URL for the Entando Application.
# Using the Hub
# Concepts
The key entities in the Entando Hub are:
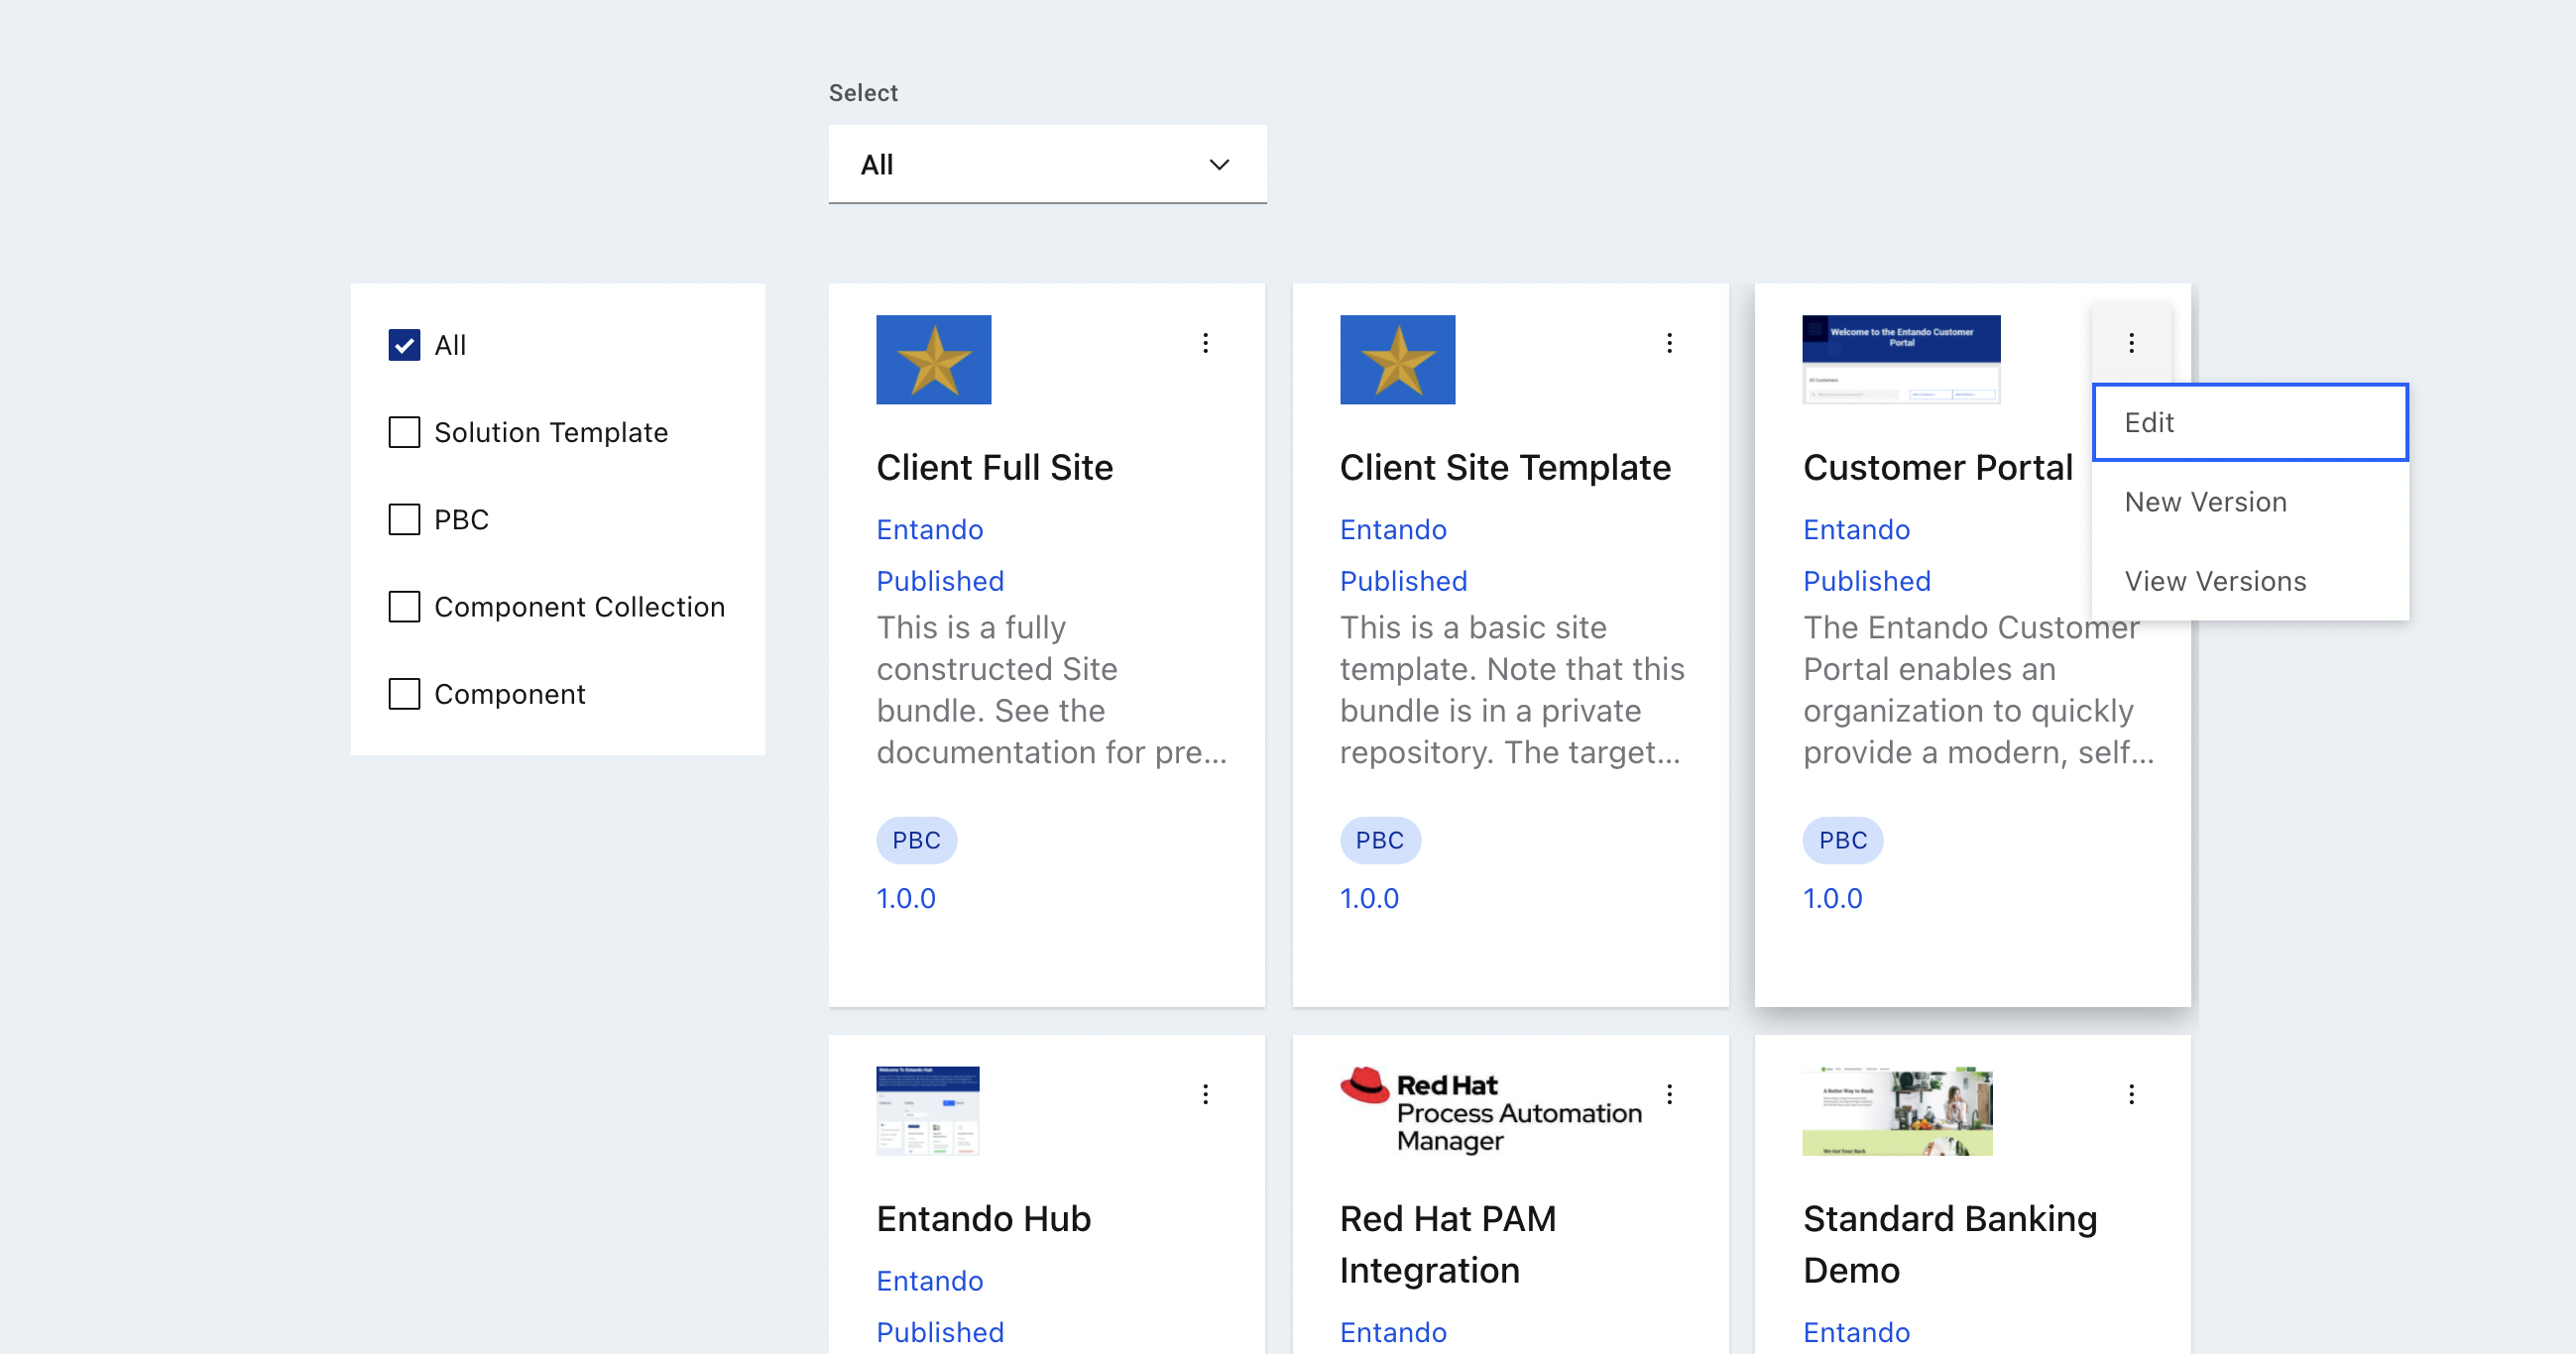
Bundle Group: A Bundle Group is a group of one or more Entando Bundles.Bundle Group Version: A Bundle Group can have one or more versions, each with a particular status.Bundle: A Bundle is the deployment unit within an Entando Application. A Bundle can contain one or multiple components such as micro frontends, microservices, or any of the component types available in Entando.Category: Each Bundle Group belongs to a specific category. The initial possible categories are Solution Template, Packaged Business Capability (PBC), or Component Collection. An admin of an Entando Hub can refine the available categories as desired.Organization: Bundle Groups belong to a single organization. Authors and managers can only update Bundle Groups for their own organization.User: User identity is managed within Keycloak, where users are granted roles within the Hub. Users must be assigned to a specific organization.
Notes:
- A private repository can be used for a Bundle, but this requires an additional Kubernetes secret before deployment via the App Builder.
# Roles
Three roles are used to provide access to the Hub features:
eh-author: An author can create and edit Bundle Groups for their organization and submit them for publication.eh-manager: A manager has the permissions of an author, but can also approve a publication request for their organization.eh-admin: An admin has full access to create, update, and delete Bundle Groups for the entire Hub instance. An admin can also create categories and organizations, and assign users to an organization.guest: Any user without one of the preceding roles is considered a guest in the Entando Hub and is given a read-only view of the public catalog. This is also true for unauthenticated users.
# Bundle Group Version Status
The possible statuses for the versions of a Bundle Group are:
Draft: This is the default status for the first version of a Bundle Group.Publication Request: An eh-author sets a version to this status to request an eh-manager or eh-admin to review the version and mark it for publication. An eh-manager or eh-admin may edit versions with this status.Published: Versions with this status are visible in the home page list of available Bundle Groups and also available in the App Builder-facing API. An eh-manager or eh-admin may edit Published versions.Archived: Previously Published versions are assigned this status. No edits can be made on an Archived version.Deletion Request: An eh-manager or eh-admin can delete versions once this status has been set.
Notes:
- An eh-author can change any field except Organization while a version is in Draft.
- There is no automated notification process when a Publication Request is made for a Bundle Group version.
# Bundle Group Creation
Clicking the Add + button at the top of the page displays the form for creating a new Bundle Group:
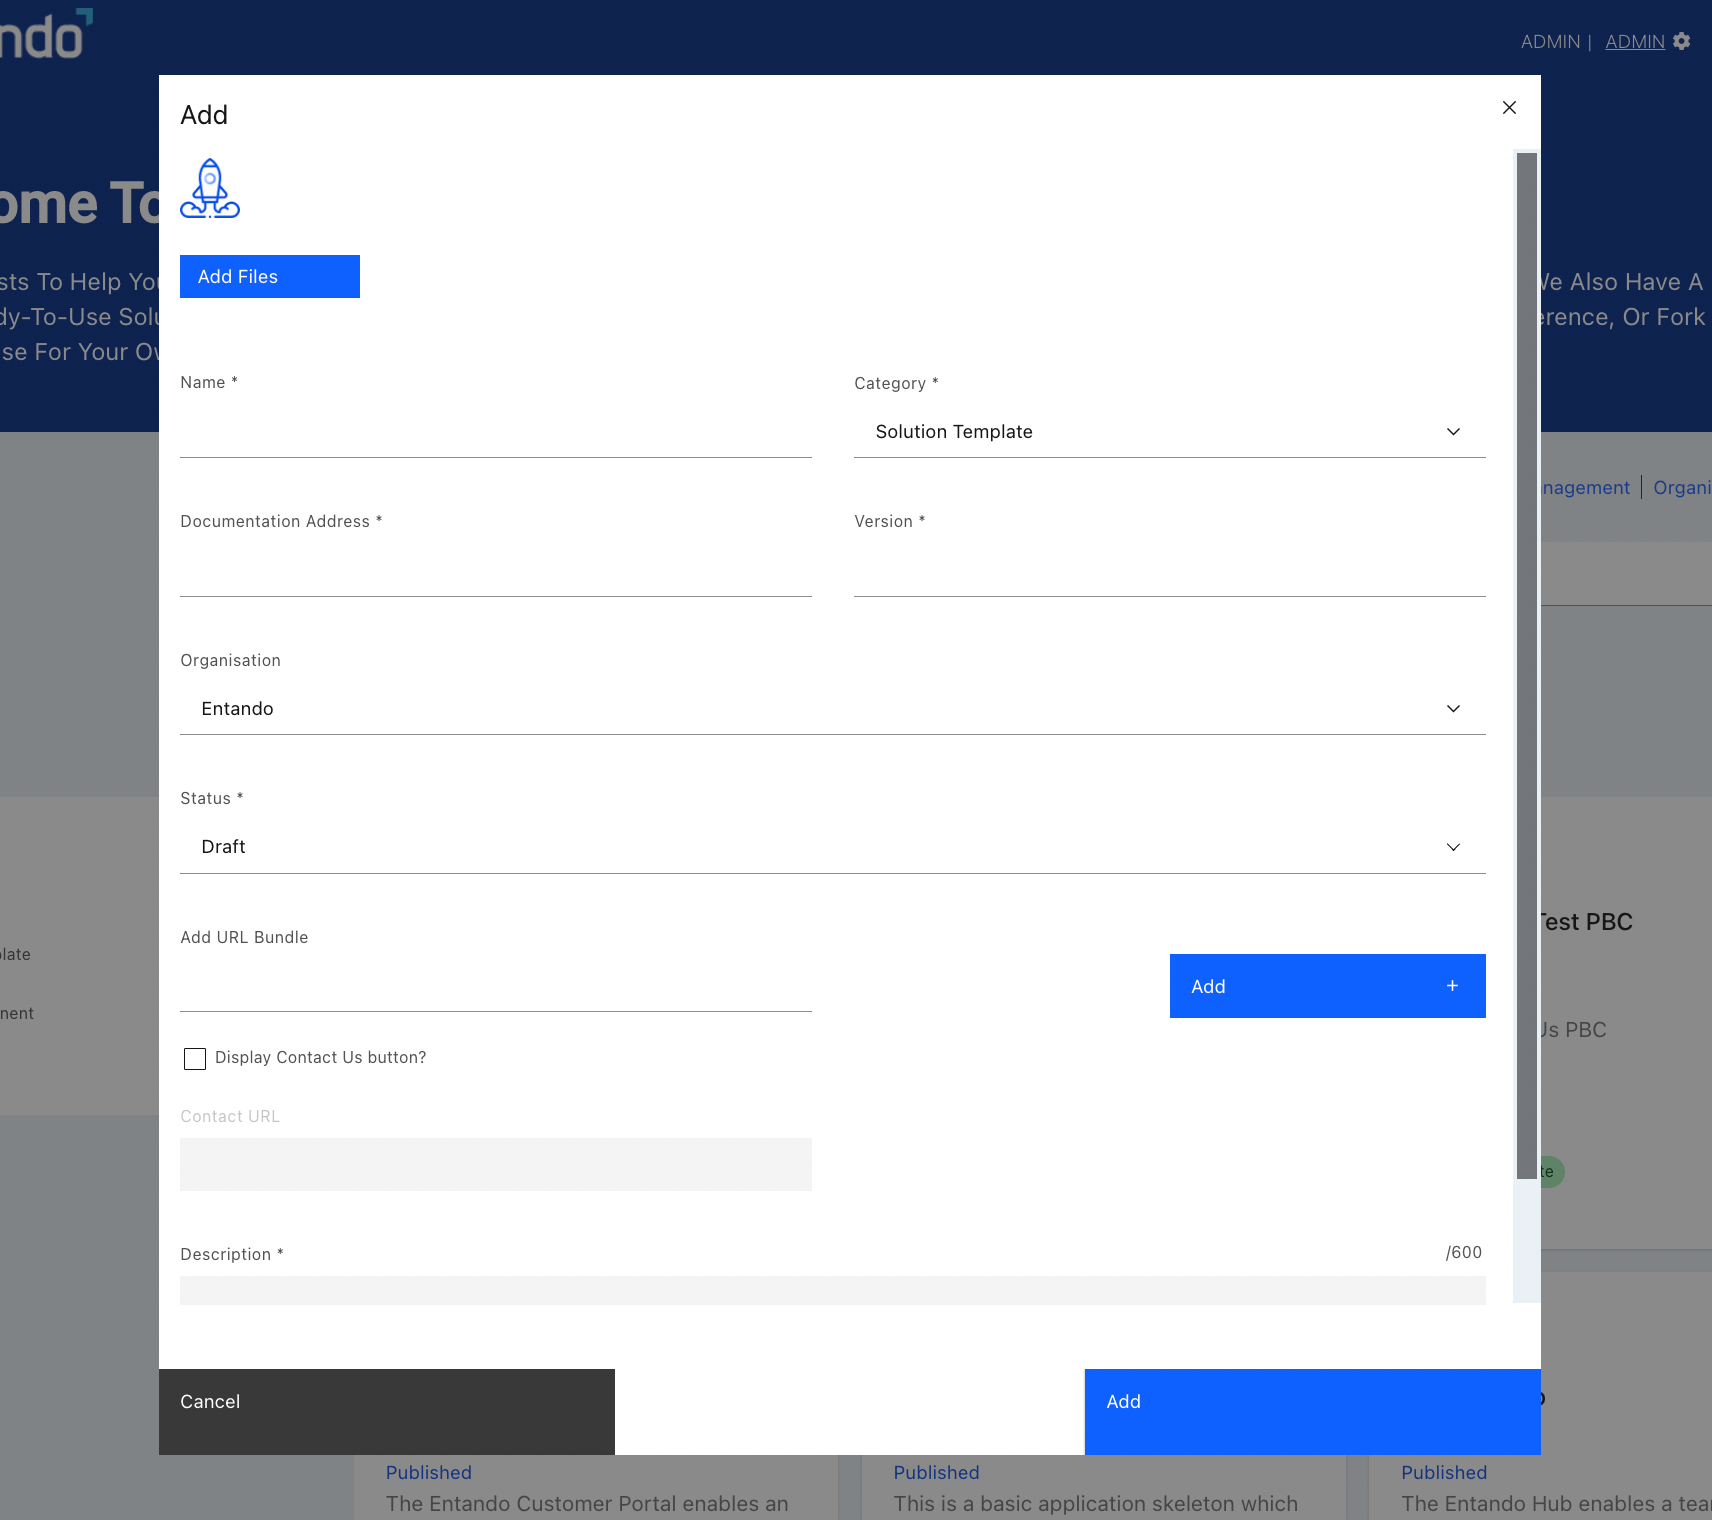
There are two ways to provide access to a Bundle Group:
- Add one (or more) bundles using
Add URL Bundle. - Check
Display Contact Us button?and enter the URL for requesting the Bundle Group underContact URL. This option allows the owner to gather more information from the user and control access to the bundle URLs. Typically, the Contact URL points to a web form on the owner's web site.
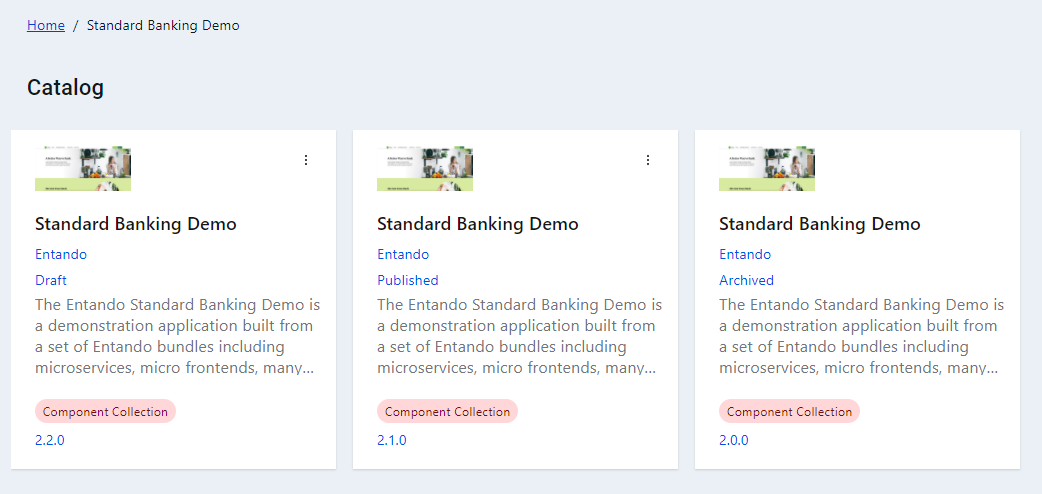
# Bundle Group Versions
The list of Bundle Group Versions can be seen by clicking View Versions on any entry in the catalog:
The following rules apply to Bundle Group versions:
- Once the first version of a group is published, the organization, name, and category can no longer be changed.
- A new version of a Bundle Group can be created (via the
New Versionoption) after the first version has been published. - There can be at most two active versions: one Draft or Publication Requested version and one Published version.
- When a new version is published, the previous version is set to Archived.
- Archived versions are only visible in the versions view and are not shown elsewhere in the user interface.
# Application Details
The Hub includes the following key components:
# Micro Frontends / Widgets
Entando Hub App: This is the main micro frontend which contains the management UI for the Hub entities noted above.Entando Hub Login: This is an optional login component which can be used in a page’s top navigation.
# Microservices
A single Spring Boot microservice provides two REST endpoints:
- The first is a backend-for-a-frontend (BFF) service for the Hub UI and contains the various entity APIs.
- The second provides methods that support the Entando App Builder integration (7.0+).
# Content
The Hub content bundle (entando-hub) includes a custom template and a page preconfigured with the main Hub micro frontends.
# Integration
The Entando App Builder should be configured using the endpoint BASEURL/entando-hub-api/appbuilder/api, where the BASEURL is the URL for the Entando Application.
# Resources
# Source Code
Entando open source examples and tutorials are available on GitHub. Reference the Hub sample project for instructions to build the project from source code: